趣头条app的sign值分析和生成
案例内容:趣头条app的sign值分析和生成。
案例环境:趣头条(8.1.0)、夜神模拟器(安卓5)、Frida(12.11.18)、Unidbg(0.9.5)
声明:文章内容仅供参考学习,如有侵权请联系作者进行删除。
@[toc]
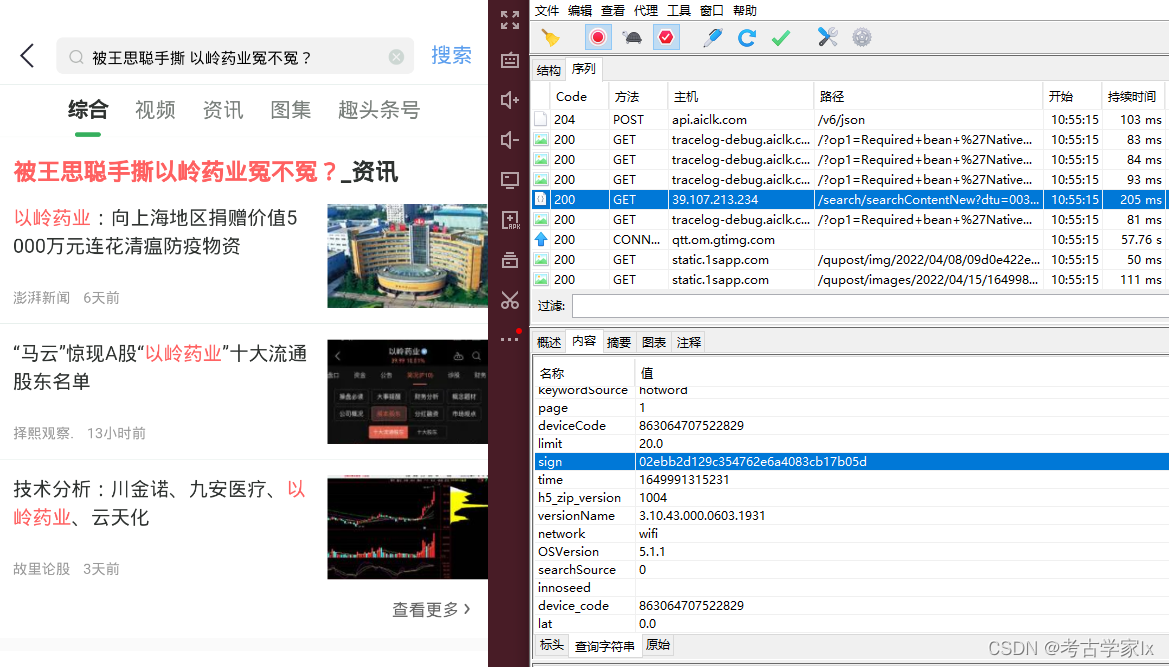
接口分析

url: "http://39.107.213.234/search/searchContentNew"
params:
{
    "dtu": "003",
    "tk": "ACH5kAjk7kEzhC-JcKT27sgVQw5V2TuYW0Q0NzUxNDk1MDg5NTIyNQ",
    "lon": "0.0",
    "token": "",
    "guid": "ee4d8ab62051306258de31e88ec1.04506739",
    "uuid": "ba4be62de1e14e14a80f64e9e1ef42f3",
    "tuid": "-ZAI5O5BM4QviXCk9u7IFQ",
    "tabCode": "0",
    "oaid": "",
    "distinct_id": "d81d2cf27a955ec6",
    "version": "31043000",
    "keyword": "%E8%A2%AB%E7%8E%8B%E6%80%9D%E8%81%AA%E6%89%8B%E6%92%95%E4%BB%A5%E5%B2%AD%E8%8D%AF%E4%B8%9A%E5%86%A4%E4%B8%8D%E5%86%A4%EF%BC%9F",
    "traceId": "94c370c5a88283dafd2f235f29a7762a",
    "keywordSource": "hotword",
    "page": "1",
    "deviceCode": "863064707522829",
    "limit": "20.0",
    "sign": "02ebb2d129c354762e6a4083cb17b05d",
    "time": "1649991315231",
    "h5_zip_version": "1004",
    "versionName": "3.10.43.000.0603.1931",
    "network": "wifi",
    "OSVersion": "5.1.1",
    "searchSource": "0",
    "innoseed": "",
    "device_code": "863064707522829",
    "lat": "0.0"
}
经过简单的测试,发现params中的参数都不能缺少。说明服务端对这些都进行了校验,那么直接在源码中检索这些关键词定位即可。

经过一顿找,hook了几个位置,确定了在com.jifen.framework.http.napi.util.d中。
hook看看参数和参数值
包名:com.jifen.qukan
版本:8.1.0
Frida Hook
import frida, sys
def on_message(message, data):
    print("[%s] => %s" % (message, data))

session = frida.get_usb_device().attach('com.jifen.qukan')

js_code = """
Java.perform(function(){
    console.log("1 start hook");
    var ba = Java.use('com.jifen.framework.http.napi.util.d');
    if (ba){
        console.log("2 find class");
        ba.c.implementation = function(a1){
            console.log("3 find method");
            console.log(a1);
            var res = ba.a(a1)
            console.log(res);
            return res;
            }
        }
    })
"""

script = session.create_script(js_code)
script.on('message', on_message)
script.load()
sys.stdin.read()
打印结果:
参数是list,把params的参数转为 {key=value}后添加在数组中。
在函数中把list转换为了字符串,并且进行了排序。
返回的结果中则生成了sign。

所以最终的计算在NativeUtils.getInnoSoInfo(sb.substring(0, sb.length() - 1));

可以看到最终是执行了native String innoSign(String str) ,接下来继续HOOK getInnoSoInfo方法。
js_code = """
Java.perform(function(){
    console.log("1 start hook");
    var ba = Java.use('com.jifen.qukan.utils.NativeUtils');
    if (ba){
        console.log("2 find class");
        ba.getInnoSoInfo.implementation = function(a1){
            console.log("3 find method");
            console.log(a1);
            var res = ba.getInnoSoInfo(a1)
            console.log(res);
            return res;
            }
        }
    })
"""
打印结果:
计算的参数已经知晓,通过在线网站生成的md5值和返回的结果不同,说明参数在so中进行了处理。
那我们去NativeExample.so中看看innoSign方法。
So分析
找到NativeExample.so。
拿IDA反汇编。
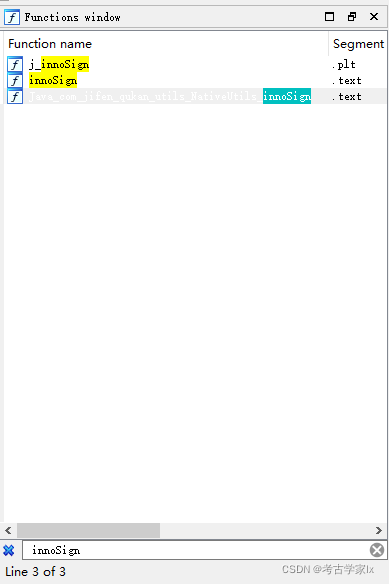
搜索innoSign。
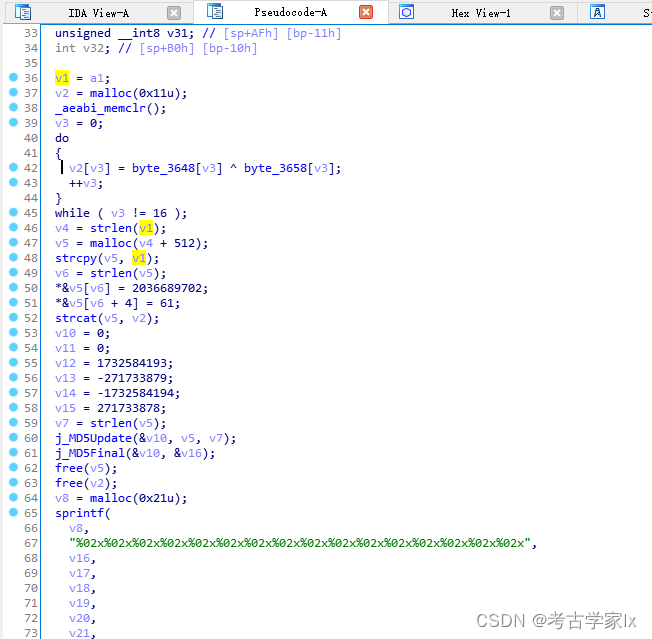
双击innoSign进入后F5查看伪代码。
innoSign()内容如下:
int __fastcall innoSign(const char *a1)
{
  const char *v1; // r6
  char *v2; // r4
  int v3; // r0
  size_t v4; // r0
  char *v5; // r5
  size_t v6; // r0
  size_t v7; // r0
  char *v8; // r4
  int result; // r0
  int v10; // [sp+48h] [bp-78h]
  int v11; // [sp+4Ch] [bp-74h]
  int v12; // [sp+50h] [bp-70h]
  int v13; // [sp+54h] [bp-6Ch]
  int v14; // [sp+58h] [bp-68h]
  int v15; // [sp+5Ch] [bp-64h]
  unsigned __int8 v16; // [sp+A0h] [bp-20h]
  unsigned __int8 v17; // [sp+A1h] [bp-1Fh]
  unsigned __int8 v18; // [sp+A2h] [bp-1Eh]
  unsigned __int8 v19; // [sp+A3h] [bp-1Dh]
  unsigned __int8 v20; // [sp+A4h] [bp-1Ch]
  unsigned __int8 v21; // [sp+A5h] [bp-1Bh]
  unsigned __int8 v22; // [sp+A6h] [bp-1Ah]
  unsigned __int8 v23; // [sp+A7h] [bp-19h]
  unsigned __int8 v24; // [sp+A8h] [bp-18h]
  unsigned __int8 v25; // [sp+A9h] [bp-17h]
  unsigned __int8 v26; // [sp+AAh] [bp-16h]
  unsigned __int8 v27; // [sp+ABh] [bp-15h]
  unsigned __int8 v28; // [sp+ACh] [bp-14h]
  unsigned __int8 v29; // [sp+ADh] [bp-13h]
  unsigned __int8 v30; // [sp+AEh] [bp-12h]
  unsigned __int8 v31; // [sp+AFh] [bp-11h]
  int v32; // [sp+B0h] [bp-10h]

  v1 = a1;
  v2 = malloc(0x11u);
  _aeabi_memclr();
  v3 = 0;
  do
  {
    v2[v3] = byte_3648[v3] ^ byte_3658[v3];
    ++v3;
  }
  while ( v3 != 16 );
  v4 = strlen(v1);
  v5 = malloc(v4 + 512);
  strcpy(v5, v1);
  v6 = strlen(v5);
  *&v5[v6] = 2036689702;
  *&v5[v6 + 4] = 61;
  strcat(v5, v2);
  v10 = 0;
  v11 = 0;
  v12 = 1732584193;
  v13 = -271733879;
  v14 = -1732584194;
  v15 = 271733878;
  v7 = strlen(v5);
  j_MD5Update(&v10, v5, v7);
  j_MD5Final(&v10, &v16);
  free(v5);
  free(v2);
  v8 = malloc(0x21u);
  sprintf(
    v8,
    "%02x%02x%02x%02x%02x%02x%02x%02x%02x%02x%02x%02x%02x%02x%02x%02x",
    v16,
    v17,
    v18,
    v19,
    v20,
    v21,
    v22,
    v23,
    v24,
    v25,
    v26,
    v27,
    v28,
    v29,
    v30,
    v31,
    v19,
    v18,
    v17,
    v16,
    v10,
    v11,
    v12,
    v13,
    v14,
    v15);
  result = _stack_chk_guard - v32;
  if ( _stack_chk_guard == v32 )
    result = v8;
  return result;
}
简单看了一下,最后返回了result。result = _stack_chk_guard - v32;if ( _stack_chk_guard == v32 ) result = v8;
_stack_chk_guard 是检查栈帧是否溢出,检查数据是否被修改。
不往下追了,后面还有很多内容。接下来通过unidbg来调so的方法。
Unidbg调用
先搭个架子执行下看看是否需要补环境,路径自己改一改。
package com.jni;
import com.github.unidbg.AndroidEmulator;
import com.github.unidbg.Module;
import com.github.unidbg.linux.android.AndroidEmulatorBuilder;
import com.github.unidbg.linux.android.AndroidResolver;
import com.github.unidbg.linux.android.dvm.*;
import com.github.unidbg.memory.Memory;
import java.io.ByteArrayOutputStream;
import java.io.File;
import java.io.IOException;
import java.io.ObjectOutputStream;

public class qutoutiao extends AbstractJni {
    private final AndroidEmulator emulator;
    private final VM vm;
    private Module module;
    String rootPath = "C:\\Users\\Desktop\\AppTest\\";
    File apkFile = new File(rootPath+"趣头条.apk");
    File soFile = new File(rootPath+"libNativeExample.so");

    // OtoB: Object to Bytes;
    private static byte[] OtoB(Object obj){
        try {
            ByteArrayOutputStream ByteStream = new ByteArrayOutputStream();
            ObjectOutputStream ObjectStream = new ObjectOutputStream(ByteStream);
            ObjectStream.writeObject(obj);
            ObjectStream.flush();
            byte[] newArray = ByteStream.toByteArray();
            ObjectStream.close();
            ByteStream.close();
            return newArray;
        } catch (IOException e) {
            throw new IllegalStateException(e);
        }
    }

    public qutoutiao() {
        emulator = AndroidEmulatorBuilder.for32Bit().build();
        final Memory memory = emulator.getMemory();
        memory.setLibraryResolver(new AndroidResolver(23));
        vm = emulator.createDalvikVM(apkFile);
        vm.setVerbose(false);
        vm.setJni(this);
        DalvikModule dm = vm.loadLibrary(soFile, true);
        module = dm.getModule();
        dm.callJNI_OnLoad(emulator);
        Runtime.getRuntime().addShutdownHook(new Thread(new Runnable() {
            @Override
            public void run() {
                try {
                    emulator.close();
                } catch (IOException e) {
                    e.printStackTrace();
                }
            }
        }));
    }

    public String get_sign(){
        DvmClass BitmapkitUtils = vm.resolveClass("com/jifen/qukan/utils/NativeUtils");
        String params = "OSVersion=5.1.1&deviceCode=863064707522829&device_code=863064707522829&distinct_id=d81d2cf27a955ec6&dtu=003&guid=ee4d8ab62051306258de31e88ec1.04506739&h5_zip_version=1004&innoseed=&keyword=Lx&keywordSource=search&lat=35.00024265777022&limit=20.0&lon=107.56824527000379&network=wifi&oaid=&page=1&searchSource=0&tabCode=0&time=1650004096206&tk=ACH5kAjk7kEzhC-JcKT27sgVQw5V2TuYW0Q0NzUxNDk1MDg5NTIyNQ&token=&traceId=94c370c5a88283dafd2f235f29a7762a&tuid=-ZAI5O5BM4QviXCk9u7IFQ&uuid=ba4be62de1e14e14a80f64e9e1ef42f3&version=31043000&versionName=3.10.43.000.0603.1931";
        StringObject signs = BitmapkitUtils.callStaticJniMethodObject(emulator,"innoSign()",params);
        String sign = signs.getValue();
        return sign;
    }

    public static void main(String[] args) {
        com.jni.qutoutiao qtt = new com.jni.qutoutiao();
        System.out.println(qtt.get_sign());
    }

}
用frida hook的参数和Unidbg执行结果进行对比。
发现两者一致。
继续抓包对比下。将数据包params的sign删除后按key排序生成新字符串,放到unidbg中执行。生成的sign和返回的一致。
那么本节案例到此结束了,大家动手操作一遍!

评论已关闭